Sunday, December 12, 2010

Christmas Cheese Gifts


For Christmas this year my wife and I joined forces to gift some family members with a decorative reusable grocery bags filled with goodies: Home made cookies,  Irish Soda Bread, Cheese Crackers, a wedge of Farmhouse Cheddar, and a jar of Feta in Basil infused olive oil.


I made Feta in basil infused olive oil in half pint decorative canning jars.  Using one gallon of 0% fat milk and 16 scoops of goat milk powder, and adding ¼ tsp of Lipase powder, I made one pound 13oz of feta using the recipe I posted earlier. It was aged 4 days before being “canned” with the olive oil.
The basil infused olive oil started out as 3 cups of extra virgin olive oil. Heated to 180F before adding a Tbs of dried basil, the oil takes on the taste of the basil and was allowed to cool.
I cut the feta to about 1/2” cubes and filled six 1/2pt jars. Filling the jars with the olive oil and putting the lids on, finishes these nice gift jars.
Joan made some labels with “Made by the Cheesy Geek” to put on each of them. 


This is the 4lb Farmhouse Cheddar that I made in October. I quartered it and waxed the exposed edges. (And, yes, I took the opportunity to taste it and it tastes like cheddar. (-: )

Overall, I am happy with these cheese gifts. I know that they are not perfect and I'd like the cheddar to be a bit more moist. I also did not compensate for the larger mold when adding the weights for pressing this cheese. I know better now.  There was some sediment in the Feta jars I'd like to eliminate next time. I'll probably have to rinse them off before putting them in the jars.

I hope you all have a Merry Christmas and a Happy New Year.

the Cheesy Geek

Tuesday, November 9, 2010

Feta! Feta! Every where Feta!


Sunday was Feta day at my house. Boy, did I make some Feta. Chef Paula asked me to make some Feta for the soft opening of the school Bistro. The feta will be put into basil infused olive oil and served to the guests as one of the “Chef’s Treat”.

I do have a confession to make. I got 5 gallons of skimmed milk on Thursday and planned to make the Feta on Friday. I mixed one can of powdered goat milk with 2 ½ gallons of the milk in one of my new stainless steel stock pot. New as in: I just got it and never used it before. (I’ll probably post a blog about them another time). I put the pot on my induction burning and started it up to bring the temperature of the milk up to 86F.  About half way through the heating process I got distracted for about two minutes and quit stirring the pot. Can we say: BIG MISTAKE? When I got back to it there was a distinct burnt smell in the air and little brown and black bits were floating around the top of the milk. At this point I KNEW that there was no chance of making an edible cheese from this pot. However, I went ahead and finished the process of making the Feta to test the process I would use on the real batch. Afterward, I fed the hungry sewer gods some not so good cheese. (OK, terrible cheese).

I worked Saturday so I started my next attempt after church on Sunday. This time I used the next size larger pot as the bottom of a double boiler and everything went smoothly. I also started a smaller batch from one gallon of fresh goat’s milk. I want to have a direct comparison between “real” Feta and one made with powdered goat milk mixed with skimmed cow milk.

The whole process used 5 stock pots, four pieces of cheese cloth, three wooden spoons, two thermometers, one slotted spoon and a partridge…(oops, nearly got carried away). Eight and a half hours after I started the Feta went into plastic containers and into the refrigerator to age for a few days.

The 2 ¾ gal batch weighed out at a whooping 4lbs 12oz. I know it will lose some whey weight as it ages a few days but I’m impressed. The one gal of fresh goat milk had a yield of 1lb 11oz. which will also shrink some also.

On Thursday I’ll cut the Feta into ½’ cubes and put them in the basil infused olive oil. A previous test has indicated that it will last at least 60 days in the refrigerator. It will get a sharper flavor as it ages but the olive oil cuts that and the saltiness when eaten.

Until Next Time,
Don’t scorch the milk.

The Cheesy Geek

Thursday, October 28, 2010

An interesting discovery

Last night I was thinking about what cheeses I've made since Feb. I have the book "Home Cheese Making", by Ricki Carroll which has 75 cheese recipes and 11 "Other Dairy Products" (chapter 10). This has been my guide for almost all my cheese making so far and already shows the signs of being in an active cheese making zone. With margin notes and drip marks of whey from spoons and fingers, anyone looking at it would instantly know what a valuable resource it has been in our "make room" (the kitchen).

With the movie "Julie & Julia" being so popular, the thought runs through the mind to do something similar with this book as well. The geek went straight to the computer, opened an Excel spreadsheet and began listing all the recipes in the book, by category and page number and which ones I've already made. The tally was 15 of the 75 I've made at least once, and 3 of the 11 other dairy products. This doesn't count a few variations I did on my own, like smoke flavored gouda and mozzarella or the 0% cow milk with powdered goat milk feta. It doesn't include the numerous flavorings of mascarpone, yogurt cheese, honey yogurt, feta in basil infused olive oil, or a feta stuffed mozzarella heart (labor intensive to say the least). The key lime mascarpone in mini filo cups is a must do again. The finger sized baked potatoes with yogurt cheese with cheddar cheese, chives and bacon bits (mini baked potato) is a special occasion appetizer that needs a little tweaking. Of course, cheese cakes made with home made cream cheese or fomage blanc are decadent desserts for times when calories don't matter.

It has been very helpful having Chef Paula as my taster. Her palate and food knowledge has been invaluable as I have progressed and improved my techniques. We have spent a couple days together making cheese and have time during the week to talk and to bring her samples of my latest attempts at cheese making. Her husband has been spoiled by the constant flow of fresh yogurt to his house. It has been encouraging to have her ask me to make cheese for special events she is doing. The school is doing a Bistro as a fund-raising event in November, and my feta in basil infused olive oil will be on every table.

I enjoyed doing the cheese making party. I know Jean got inspired to make mozzarella as soon as she could. I received an excited voice mail on Monday morning saying she got up at 6:30, went out a got some milk and by 9AM had a pound of mozzarella (partially eaten). BTW Jean makes wonderful scones that are even better with strawberry preserves and fresh mascarpone.


I wouldn't be fair if I didn't mention my wonderful and understanding wife. It is not every wife who will allow her husband to take over part of the kitchen and half the kitchen table to make cheese. Our kitchen has had a small refrigerator and a chrome cart invade the one wall. Plastic containers, cheese cloth, molds, large pots, a heating pad, weights, and various utensils adorn "My corner" of the room. Thank you, Dear, I love you.

Okay, it's on to the next adventure. Haloumi is next on my make list. Fresh goat's milk will be here on the Nov 5th. and I'll post the results here as soon as I can. That will be number 16: only 59 to go.

The Cheesy Geek
George.

Sunday, October 24, 2010

Bigger Farmhouse Cheddar


Is bigger better? Hopefully we'll find out the answer to that burning question in late December. Well, at least about farmhouse cheddar cheese. Using a borrowed 20 quart pot, I spent the day Saturday making a double batch of Farmhouse Cheddar cheese. Four gallons of milk looks huge compared to the two gallon batches I've been making. As the curds formed I wondered if the mold would hold them all. When it came time to put them in, I packed and pressed and packed some more and filled the mold to the top. Surprise, they all fit.

I put the weights on the follower and waited. The stack of weights fell over 3 times in the first four hours. And, over night they did an impersonation of the leaning tower of something, resulting in an uneven cylinder of cheese this morning. Weighing in at 4lb 10oz, this is the biggest cheese I've made so far. It is too big to wax in the deep fryer I'm using as a wax pot so I'll have to brush the wax on. Probably it will be ready for waxing Weds or Thurs.so I'll post another picture at that time.

Here is a comparison picture of the two lb waxed farmhouse cheddar I made last Saturday and the one I made yesterday.

Have fun and make more cheese
the Cheesy Geek

Saturday, October 23, 2010

Another Cheese Cake

Chef Paula used some of the last batch of Fromage Blanc to make this cheese cake. She added 1/4 cup of lime juice to a standard New York style cheese cake recipe. As you can see, it has been enjoyed already.

I really enjoyed the texture and smoothness of the cheese cake. If a chiffon cheese cake is a one(1) on the heavy/light scale and a regular New York cheese cake is a ten(10), this comes out a seven(7). There is just enough lime to give it a distinct tang without overpowering the cheese. For me, this recipe using the fromage blanc was a treat I wouldn't mind having again. It gives me the satisfying taste and the firmness of a heavier cheese cake without the fullness.  I'll try to get the actual recipe she used and post it.

Tuesday, October 19, 2010

From Cream Cheese to Pumpkin Cheesecake

Freshly made cream cheese made from half and half. This is approximately 16oz by weight out of 24 oz made from two quarts of half and half. It turned out very creamy and fairly light.

Then Joan got a hold of it and added some fresh pumpkin and a few more ingredients and made this delicious pumpkin cheese cake. It was light, and creamy and very good. Thanks Honey.


Monday, October 11, 2010

Cream Cheese-Second Try

I used half a Gallon of Great Value half and half from Walmart. (pull date Nov 30) I heated the milk to 70 on the induction plate then took it off the hot plate. The temperature continued to rise to 80. Room temp was 77.6. I added 3/32 tsp of the mesophilic started MA 011 bulk pack and let it sit from 10:15am until 6:30pm. It had formed a solid mass and pulled away from the sides when pressed. I poured it into butter muslin and hung it to drain. At 9:00pm I changed the butter muslin and left it to drain overnight.

At 6:30am I took it out of the muslin and put it into containers. The volume yield was just over 3 cups. The weight yield was 1lb 10oz.

It is very smooth, light and mild tasting. I thought it was a bit on the moist side but it will probably be better after it has chilled. I didn't press it so it is not as dense as store bought.

Joan has some fresh pumpkin she cooked down and is going to make pumpkin cheese cake with this batch. I'm looking forward to having it this weekend.

Note: I gave some to Chef Paula and she said it was the best cream cheese she ever had. (-:

Tuesday, October 5, 2010

Parmesan Cheese after 3 1/2 Months

This is the Parmesan style cheese that I made June 19 of half 1% skimmed cow milk and half fresh goat milk. The original weight was 1lb 8oz before brine bath and 1lb 6oz after. I have removed mold that formed on it every week or so, then in the first week in Sept. I wiped it down and then brushed it with extra virgin olive oil, leaving it slightly wet. It has since absorbed the oil and the surface has just a very light feel of oil and has a very hard rind. It now weighs 1lb 1oz.

I'm looking forward to May when I plan to open it up and taste it for the first time.

The Cheesy Geek

Friday, October 1, 2010

My First Waxing


I waxed my first cheese last night. It is a gouda that I made on Sept 12. It has been sitting in the "cave" since then and has lost 6oz in weight. I used a deep fryer we haven't been using for melting the wax. It is a Euro Pro F1045 which has a timer dial and a temperature control. The temperature control is marked starting at 275F but that mark is at the one o'clock position on the dial. I put 4lbs of wax in it to melt with the dial at about the 9 o'clock position. Once the wax melted completely and the heater light turned off, I checked the temperature and adjusted the dial until the temperature of the wax was a stable 235F. I added wax until it was at the "full" line. I then turned the heat off.

For my first coating I used the deep fryer's basket and dipped the wax for about 6 seconds. It completely submerged in the wax. After taking it out to cool, the bottom of the cheese stuck to the wire basket and some of the wax pulled off. )-: So I hand dipped it, half at a time. Then set it on some aluminum foil to cool. I used a brush to touch up a few of the thinner areas and the drips down the side.

For the second coating, I waited until the wax had cooled to 190F and repeated the hand dipping. The picture above is the end result. What looks like bubbles on the top is actually where the wax was dripping off the cheese when it came out of the pot.


As a friend said. "Hey, it's what's under the wax that counts!!!" We'll see in about three months if what's under the wax is worth all the "work".

If nothing else I had fun and learned a few things. One thing I think I need to pay more attention to the texture of the outside of the cheese and smooth the surface out more. Also the edges around the top and bottom were very sharp and in a couple areas had a lip on it. I probably should round the edges off a little after it comes out of the mold.

BTW I'm planning on another cheese making party on Sat. Oct 16th with a few friends. I'm looking forward to it. (-:

The Cheesy Geek

Monday, September 6, 2010

Fromage Blanc

I had ordered this culture (The New England Cheese Making Supply Company item C20) a few months ago along with several others but just hadn't gotten around to actually making it.

According to the website
"This starter culture has to be one of the most sensational finds we have made in all our years of cheesemaking. It is so simple even your children can make it. It is similar to cream cheese with a delightfully rich flavor. Fromage Blanc can be used in cooking or simply spread on your morning toast."

I started out with Walmart whole milk with pull by date 18 days away. Heated to the recommended 86F, then adding the culture and letting it rehydrate for 2 minutes before stirring it in for 2 minutes. I let it sit at room temp (76F) for 12 hours. I ladled it into a colander lined with butter muslin until it was full. I ended up with two batches. After tying the corners together and over wooden spoons, I let them drain for 11 hours. When I opened them up, this is what I found. A nice, moist, creamy soft cheese. Due to the higher room temp, it was a bit tangy but not as much as a yogurt cheese. The texture was also smoother than yogurt cheese. I think this could be used very nicely as a base for any dip calling for Cream Cheese. With a few more attempts experimenting with culturing time and combinations of herbs and spices this will be a nice party cheese in the future for the Cheesy Geek.

Total yield from 1 gal of whole milk= 1lb 14oz

Sunday, September 5, 2010

Greek Style Yogurt

I have been making more yogurt and yogurt cheese lately. I have ready many posts on other blogs about yogurt being too thin. The most obvious solutions have been to add powdered milk to the milk when you start, or add pectin to the yogurt or the drain it in cheese cloth. Somewhat by accident I think I discovered another method to make thicker yogurt.

About an hour before taking the yogurt and putting it in the fridge, cut the curds the same way you would for making any regular cheese. The smaller the cuts, the thicker the yogurt will be. Let it sit for an hour or two then carefully drain off the whey that has separated from the curds. I made 1/2 a gallon of yogurt in a 5 quart pot and poured off two cups of whey before stirring and refrigerating the yogurt. This was using 1% skim milk. The results were almost as thick as the Greek Style Yogurt I had purchased in the past.

Hope this helps you make even more delicious yogurt than ever.

The Cheesy Geek

Sunday, August 1, 2010

Feta Experiment


Since my source of fresh goat milk has dried up for a couple of months I decided to experiment with some Meyenberg powdered goat milk. My first attempt was using 1 quart of reconstituted goat milk and cutting the recipe down to 1/4 of the 1 gallon procedure. It worked...sorta. The curds were very weak and fell apart during the first minute of slow stirring. I went ahead and drained the whey and got 4.40z of cheese that resembled Ricotta and had a mild goat flavor. I salted it and let it sit a couple days in the fridge and it was okay but not close to the flavor I had been getting with fresh goat milk.

Experiment #2

I mixed 8 scoops of Meyenberg powdered goat will with 1 gal of 0% fat skim milk from Wal Mart. (sell by date Aug 18)
added 1/8 lipase in 1/4 cup water and 1/8tsp calcium chloride. Heated to 86F and added 1/8 tsp MA011 mesophillic culture and let set for 60 minutes

1/4 tsp of liq veg rennet in 1/4 cup of water. Stirred for 1 minute. And let sit for 60 minutes.

Very good curd formation. Custard like consistency.

Cut curds to approx 1/2 inch squares. Let sit for 10 minutes and then slowly stirred for 20 minutes. Transferred curds to cheese cloth and let it hang for 5 hours.

Cut the cheese into approx 1 inch squares and salted with 1 Tbs of cheese salt.
Put into glass bowl and covered with plastic wrap and into the refrigerator.

Joan described the cheese squares as "like tofu". They are firm and slightly plastic. It already has a fairly strong goat flavor.

Looks a success so far. The picture at the top of the page is the results after sitting overnight in the fridge.
Yield = 1lb 11.5 oz

Sunday, July 25, 2010

Cheese Making Party 7-24-10


Saturday, July, 24th the Cheesy Geek had a very enjoyable day with some family and friends demonstrating cheese making. My oldest sister, Carol, came for the “30 minute mozzarella” demo and had to leave. My other sister, Jae, and bother-in-law, Dennis, and friends Ron and Jean from our church arrived around 11 am and stayed until almost 4 pm.

The Preparation:

I made ½ gal of sweet yogurt (Culture Y5) and made half of it into yogurt cheese. I used one cup of the yogurt cheese and made a dip.
Yogurt cheese veggie dip. I took 2 cups of yogurt made with Y5 culture and drained it in butter muslin until it was reduced by half. added 1Tbs Olive Oil, 1/2tsp each dried parsley and Italian Seasoning, 1/4tsp each garlic powder and onion salt, 1/8 tsp of black pepper. Mix well and let sit over night in fridge. It is ...similar to ranch dressing for veggies. For a cracker spread, reduce the yogurt to the consistency of cream cheese then use this recipe.
Friday night I made half batch of mascarpone and put it in the fridge overnight to drain. Using my newly arrived sour cream cultures, I started a batch from half and half and set it on the kitchen table overnight. I was a bit concerned in the morning as it failed to thicken after 12 hours. By 12:30, it had thickened but was very mild tasting. I started another batch and set it out at 7:30am and on Sunday morning it had set up and tasted like sour cream.

The day:
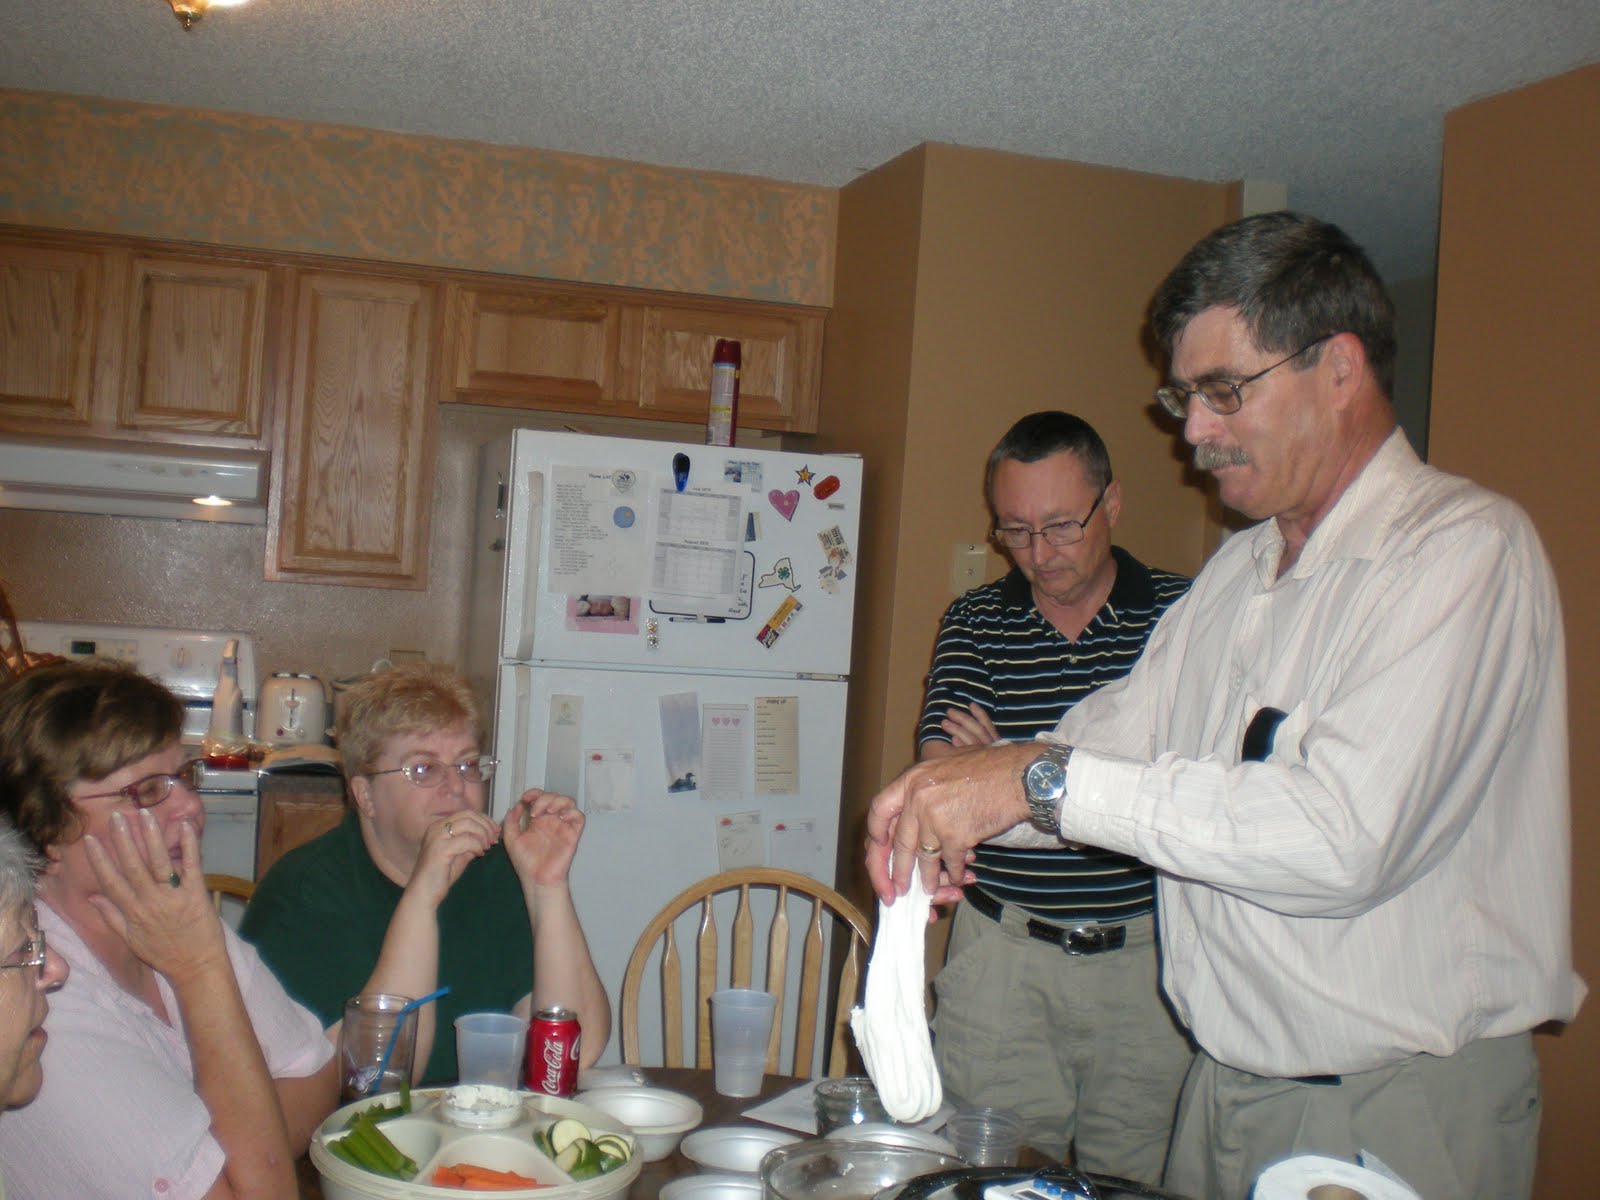
We set out a carrot, celery and cracker tray with the veggie dip out as the guests arrived. I had started heating 2 gals of milk and added the culture to make Farmhouse Cheddar just before 11. After setting the timer for 45 minutes for the cheddar, we made the Mozzarella. (Cutting the curds in picture above) As we did the necessary waiting, I brought out the yogurt and yogurt cheese and explained the process and let everyone have a taste. (We went through 30 plastic spoons over the course of the afternoon) The results of the mozzarella making were mixed. After heating the curds the first time and kneading them, I heated them a second time and split it into two balls and let Dennis and Jean do the stretching. Dennis did very well and he soon had a nice ball of mozzarella. Jean waited a bit too long and when I tried to reheat her curds I overheated it in the microwave. It never did come together. But as Jean said; “It gives me confidence to see how it doesn’t always work. I won’t get discouraged when it doesn’t work for me.”At this point Carol had to leave. )-:
I put some chicken wings in the oven (soy sauce, brown sugar and garlic powder coating) and proceeded to making mascarpone. And through the magic of advanced planning, we enjoyed chicken wings and Jean’s authentic homemade English scones with strawberry jam and freshly made mascarpone. Thank you again, Jean, for the delicious addition to our party. The farm house cheddar was ready to have its curds cut and put in the sink of hot water to “cook” for half an hour. Meanwhile, we looked at the sour cream which was actually more like Crème fraiche. Everyone found it interesting and it was a “teachable moment” with the opportunity to explain how temperature and time will affect the tanginess of the product whether it is sour cream, or yogurt.
Meanwhile, back at the farmhouse, the curds were put into the cheese cloth and set to drain for an hour. This gave us a chance to use the whey to make some ricotta. And do a little clean up. I had a couple of oops with containers with whey and had some spills. Thank you Dennis and Jean for jumping right in and cleaning up my messes. (-: After the first two 10 minute pressings in the mold and getting the curds ready for the 12 hour press, we did a little more clean up getting ready to call it a day.

The results:
In the end, I believe there are a few more home cheese makers in Florida today. They left here with enough rennet and citric acid to make at least 4 batches of mozzarella in each household represented.
A special thanks has to go to my loving wife for not only tolerating my hobby but for baby sitting two rambunctious boys for 5 hours while her kitchen was being thoroughly invaded by the cheesy geek and cheesy geeks to be.
note this last picture shows the whey from the farmhouse cheddar, the plate with what is left of the scones, the container next to it is butter, then the mascarpone and in the center of the veggies is the yogurt veggie dip.

Saturday, July 17, 2010

Catching up

I haven't posted in a while so I guess I'd better catch up with what cheesy activities have been going on here. After coming back from vacation to Ireland, I got some fresh goat milk June 19th and made of Parmesan cheese using 1 gal of 1% skimmed milk from Walmart and 1 gal of the fresh goat milk. It made 1lb 8oz of curds before brining. It came out of the brine at 1lb 6oz and is now in the cheese cave to age for 10 months. My cave has been maintaining 48-50F and humidity at 65-70%. I covered the parm with a 4 cup plastic container to increase the humidity around the cheese.
On the 4th of July weekend, I attempted 5 different cheese products. Sour Cream, Cream Cheese, whole milk Ricotta, Mascarpone, and Mozzarella. The sour cream was the only failure. I used some store bought sour cream that was in the fridge as the starter. It was only after it failed to curdle did i notice the use by date was over a month ago. live and learn. Joan used the ricotta and mozz to make lasagna Sunday evening and it was Delicious. She used the cream cheese to make a NY style cheese cake. Delectable. I made some Key Lime Mascarpone on shortbread cookies as a treat.
I also made some goat milk yogurt the week before that. Although it was thinner than cow milk yogurt using the same culture and setting the same length of time, it was a noticeably smoother texture. I drained the yogurt until it was thickened nicely and it was enjoyed by those lucky enough to get a taste.
I purchased some additional cultures including a yogurt culture, Y5. It is described as a sweeter yogurt than the Bulgarian Y1. and indeed it is much milder than the Greek style that I have been making. I made a half gal from 2% skimmed milk and used half to make yogurt cheese. The cheese product seems to concentrate the flavor and the end product is much tangier than the yogurt.
I made a nice cheese spread from it by taking 1/2 cup of the cheese, 1Tbs of Olive oil, 1/4tsp each of parsley flakes and Italian seasoning, 1/8tsp each of garlic powder, onion salt, black pepper, and dill, mixing it all together and letting it sit overnight in the fridge. It is great on crackers and as a veggie dip. (add more olive oil if you want a thinner dip). You could also add some red wine vinegar for a real bite but just add and mix a little at a time to get the right taste for you.

I'm having a get together next Saturday July 24 with a few friends and family to show them how to make mozzarella and mascarpone and maybe yogurt. Pictures to follow afterwards I hope.

Tuesday, May 25, 2010

Mozzarella Hearts with Feta Center

I used the half gallon of 1% milk from Friday and made some Mozzarella on Sunday. I used 3/4 tsp of citric acid in 1/2 cup of water and 1/8 tsp of dbl strength vegetable rennet in 1/4 cup of water. The curds set up in 10 minutes and held together very well during the heating and stirring process. I heated and stretched it three times and left it in a rope when I finished. I cut it into 1/2 oz pieces and put them in ice water for twenty minutes.

Now for the fun part. I recently purchased a mini heart muffin pan, the individual cups are 1 1/2inches. Using a large frying pan with hot water in it I heated the muffin tin. Then I heated some of the mozzarella in the microwave and rolled it out into a sheet. This went over the muffin tin and the heat helped the mozzarella stay stretchy as I filled the hearts with goat milk Feta I made last week. I made another thin sheet of mozzarella and placed it over the tin and used a rolling pin to seal the hearts. After 20 minutes in the fridge, I turned them out onto the cutting board and trimmed them to shape. (I'm not so good with that as you can see in the pic.) I picked some small sweet basil leaves and put them on top. The mozz actually looks like white chocolate when you first look at it. The taste is amazing especially if you take a little basil with it. I'm thinking that it would be nice to put some chopped basil in the heart before sealing them.

This was actually a "proof of concept" project: Trying to come up with the technique to fill mozzarella with a semi soft filling. Now I'm thinking: Key lime mascarpone, Ricotta with herbs, Yogurt Cheese with honey, strawberry preserves, grape tomato with Italian dressing, even mini burrata. Oh, the possibilities.

Saturday, May 22, 2010

More Yogurt Cheese

I made another batch of yogurt\yogurt cheese last night. Using 8 cups of low fat Walmart milk with a pull date of June 7, I added 4Tbs of yogurt I had frozen from the batch made May 9. (Thawed and allowed to come to room temperature first.) After bringing the milk to 180F and cooled to 115F in my stainless steel 8 quart pot. I placed the lid on the pot and put it on the heating pad set on low.and covered it with two layers of bath towels.

After 6 1/2 hours the yogurt had set properly. I removed two cups and put them in storage containers and placed them into fridge to chill. I also removed 8Tbs and put 4Tbs each into two small plastic bags to freeze and use for future yogurt making.

The remainder of the yogurt went into a colander lined with 2 layers of butter muslin and set into a catch bowl in the refrigerator. Covered with some plastic wrap and allowed to drain for 16 hours, it slowly stiffened up until it was the consistency of cream cheese.

Due to the shorter ripening time the yogurt has a much milder taste that previous batches which had ripened for 10-12 hours. It is still thinner than commercial yogurt but I have noticed on previous attempts that it does seem to get thicker if it sits in the fridge for a couple days.

The yogurt cheese has stronger, tangier taste to it than the yogurt. The original 6 cups of yogurt has drained down to just slightly over one(1) cup. By weight it is now 10oz.

I'm pleased with the results this time.

Thursday, May 20, 2010

The Feta Cheese

Feta Cheese

The first time I made Feta (using fresh goat milk) it turned out well except I didn’t care for the amount of salt on it. I made it according to the recipe in the book and one gallon made 1lb 4oz of curds. After cutting it into one inch squares I salted it with the lesser of the amounts recommended (2-4 Tbs. of salt). It all fit into a 4 cup container with lid and into the fridge it went for 4 days. And it was good. I noticed that the taste changed over the 4 days as it should. The fresh curd is very light tasting before salting with just a hint of goat. Over night it takes on a much stronger goatyness (not sure if that is word or not). This is not a bad taste, it is what makes it Feta. (-:

Sunday I started making the Feta again from one gallon of milk (less two cups I used to make yogurt cheese). After draining overnight, I had 1lb 3oz of curds. I split this in two and took half and put it in brine solution for four hours. It was then put on a reed mat, covered with clean cheese cloth and into the fridge. According to instructions, this piece got turned over twice a day. The instructions also say that it may be stored in a 6-8% salt solution for up to 30 days. The longer it stays in the salt the saltier it gets. (no Duh!) The other I cut into one inch squares and salted with 2 tsp of salt before putting it in plastic container in the fridge. Tomorrow, Friday, is the day of tasting.

BTW I added a few pictures to my previous blogs.

Monday, May 17, 2010

Goat Milk Yogurt

It was a slow week for cheese making last week. So Saturday I picked up a gallon of freshly pasteurized goat’s milk. (It was in the goat Friday). On Sunday, I took 2 cups of it and made it into yogurt. And the rest I started a batch of feta.

The Goat Yogurt

I used the same recipe as on the previous blog on yogurt making. I let it “age” for 8 hours before stirring and putting it in the fridge to chill for the night.

Let me make a couple of points here: Goat’s milk fat is different from cow’s milk and therefore the final product will always be thinner than the same process with cow’s milk. Second, goat’s milk has less lactose than cow’s milk. Since the culture for yogurt consumes the lactose and changes it into lactic acid, the more lactose and the longer you let it age the tangier it becomes. Third, goat’s milk naturally tastes different than cow’s milk.

This morning the yogurt was thin enough to run off the spoon. I’m going to try to thicken it up by putting in a coffee filter liner colander and let some of the whey drain off. The taste however was very nice. It is only mildly tangy and much smoother taste than the cow’s milk yogurt I made before.

I'll follow up about the feta in the next day or two, Maybe...sometime...perhaps...ok...honestly...soon.

George

Friday, May 7, 2010

Making Yogurt and Yogurt Cheese

While I’m personally not a yogurt eating person, I was asked about making yogurt cheese. (Or, more correctly, my wife was asked if yogurt could be used to make cheese.

My answer (gathered from Wikipedia): You can make a yogurt cheese which is considered a strained yogurt. Put yogurt into a coffee filter in a strainer over a bowl and let sit in the refrigerator until it is about the consistency of cream cheese. In Arab countries this is called Labneh. It is sometimes thickened further and formed into balls then put in to a jar of olive oil for a few weeks. Shankleesh is made from Labneh that has been cured and dried. Labneh is salted, dried and rolled into balls. Shankleesh is often rolled in Olive Oil and thyme, or coated with other spices.

Yogurt, itself is easy to make and much less expensive to make than store bought. It also has no preservatives or additives other than those you put in. Turning what you make into cheese is even easier.


Making Yogurt

What you will need:

1 quart of milk, whole or skim, 1% or 2% your choice
2 Tbs of your favorite non flavored store bought yogurt
1 thermometer (capable of reading at least from 100F-185F)
A double boiler
1 quart sterilized jar with lid
(optional one heating pad and heavy towel)

Bring your store bought yogurt to room temperature as you set up double boiler so the water just touches the bottom of the top pan. Put in the milk and heat to 185F stirring to keep from scalding the bottom. Remove the milk from the heat and cool to 110F. To speed this process put pan into sink with tepid water. Stir occasionally. (Do not let it go below 90F.) Once the milk is at 110F, stir in the two Tbs. of yogurt. Then place in your sterilized jar and put lid on loosely.
You will now need to let this sit for seven hours at 100F – 110F. If you don’t have an electric yogurt maker, (yeah right) you can warm your oven to 100F and put your future yogurt in there. Of course, having your oven on for 7 hours might be a bit hard on the electric bill. One alternative is to set your jar on a heating pad set on med. And cover it with a heavy towel. After seven hours, take it out and stir vigorously for a couple minutes, put the lid back on and put in the refrigerator overnight. In the morning stir it up again and it is ready to be enjoyed with your favorite topping.

Shelf life is up to 3 weeks
Yield is 1 to 1, one quart of milk yields one quart of yogurt


Yogurt Cheese

To turn your yogurt into cheese, simply place a coffee filter in a colander or strainer and put over a catch bowl and put in your yogurt. Cover with plastic wrap and put it in the refrigerator. Leave it over night and check it for consistency. If it is thick enough, enjoy it. If not, put it back and let it drain longer until it is what you want. Most people like it about the consistency of cream cheese.
At the right is what is left of 1 1/2 cups of goat milk yogurt after being drained for 24 hours. The containers are 4oz size. The one on the left is unaltered and is tangy and goaty. The one on the right I mixed a little honey in to it and made a nice sweet treat.

Enjoy
George

Tuesday, May 4, 2010

Making Mozzarella: The "30 minute" method


Ok, so I talked about making Mozzarella but didn't you tell HOW to make Mozzarella. (Perhaps this is part of my evil geek plot to keep you coming back to read my blog. muhahahaha!)

Ingredients:
1 gal whole milk (I have been using Wal-Mart brand at $2.98 with pull date of 17-19 days)
1 1/2 tsp of food grade citric acid dissolved in 1 cup unchlorinated water
1/4 to 1/2 rennet tablet dissolved in 1/4 cup unchlorinated water

You will also need the following equipment

1 non reactive pot big enough to hold 1 gal of milk, with lid (Non reactive means not aluminum or steel pots. Stainless steel or enameled steel pots work fine. I have a 7.5 quart enameled steel pot.
1 thermometer that will accurately read lower temps
1 non reactive slotted spoon
1 timer (optional)
1 knife for cutting the curds (long enough to reach the bottom of the pot)
1 microwavable bowl 2.5 quart glass works well
A bowl of ice water
Plastic wrap
A microwave
And, of course, a range

It’s pretty simple to start with. Pour the milk into your pot then add the citric acid slowly while stirring vigorously. Do not reverse this order as the acid will curdle some of the milk as it comes into contact with the acid and you will get milk that looks like cream of wheat. That is not what we are looking for at this point.

Bring the milk to 90 degrees, stirring to prevent scorching the milk. I have started using my 12.5 quart stock pot as the bottom of a double boiler and can bring the milk up to temperature faster and safer than directly on the burner. At 90 degrees remove pot from heat and add the rennet. Stir slowly, gently, and in an up down motion for 30-60 seconds. You do not want the milk to continue moving after you finish stirring as it breaks up the curds as they are forming. Put a lid on it and set timer for 5 minutes or check your watch. Leave it alone. Don’t even peek.

After five minutes, check for curd development. With store bought milk, it probably isn’t ready yet. Check back every five minutes until the curds are ready. It should look like custard and the whey should be clear green. Once it is ready cut the curd into 1 inch squares. Then retrace your cuts but at a 45 degree angle from the first cuts. Cut all the way to the bottom and sides as you go. Don’t worry if they aren’t exactly one inch.

Put the pot back on the heat and bring the temperature of the whey to 105F while gently moving the curds around in the pot. Take the temp at different depth and locations in the pot to insure even heating of the curds. Once it is at 105F remove from heat and stir slowly for 2-5 minutes. (The longer you stir the dryer the mozzarella will be.) Take the curds out of the whey with the slotted spoon and put them into your bowl. Drain off as much of the whey as you can without pressing on the curd. (All right, you can press a little) Put the bowl in the microwave and heat on HIGH for one (1) minute. Pour off any additional whey that has separated from the curd. Knead the curds like you would in making bread (fold over half on top of itself and press down). Repeat in different directions several times until the curd begins to cool. Nuke it again for 30 seconds and drain whey as needed. If it is ready and is hot enough (135F) it will begin to stretch when you pick it up. Time to have some fun. Think “Taffy Pull”. Hold one end in one hand and stretch it with the other and when you run out of arm bring the ends together and start over. When it starts to break when you stretch it, nuke it again for 30 seconds. I have only been repeating the heating process 2-3 times. Any more than three times and I end up with a nice ball of soft plastic.

After you’ve made a few batches, you’ll get a feel for when it is “right”. And that is when you bring it together and form it back into a ball, or form strings, or small balls or or or. Put your final product in an ice water bath until it is cold. For a 1lb ball that is about 20 minutes. For string cheese 2-3 minutes. Take it out and let it surface dry before wrapping it in plastic wrap and put it in the refrigerator. You can skip the ice bath if you like the fresh warm cheese so much that you eat it all before it gets to take the bath.

Sunday, May 2, 2010

Macarpone making update

On Saturday, May 1, we went to Whole Foods Market in Orlando. We wanted to look around and see what they have and what kind of pricing on products. One of the main things I was looking for was the milk and cream products. We did find pasteurized goat milk in quarts and half gallon. The half gallon was around $4.99, which is in line with farm fresh pasteurized goat milk at $8-10 gal.
Since I have been focused on mascarpone lately, I wanted to find some light or heavy cream that is not ultra pasteurized. The only one I found at Whole Foods was a pint of “Natural by Nature” organic heavy cream from grass fed cows at $4.29 a pint. The pull date on the cartons ranged from May 7 to May 10. I bought two with the May 10 date. (I checked with the "Natural by Nature" website and the shelf live of their heavy cream is 17 days from manufacture date, which means what I purchased was already in the carton for 8 days.)
I made up the first batch shortly after we got home. (I didn’t think I could sleep not knowing how this would work.) The cream is more yellowish than the Wal-Mart cream I had been using. (higher fat content and being grass fed cows?) I used 1/8 tsp tartaric acid instead of lemon juice this time. There is a slight difference in the taste of the final product but the tartaric acid gives more consistent results than lemon juice. The rest of the process was the same as what I described earlier. I put the cheese in the colander at 6:00P.M.. By 10:00P.M., it was thick enough for use. This sure beats the 12-24 hours for the ultra pasteurized Wal-Mart heavy cream.
I made the second batch on Sunday afternoon. It took a bit longer to drain and thicken but the final results were nearly identical to the first. Yield: 12oz each batch.
The first question is: Is there a significant difference in the results from the ultra pasteurized cream? The texture is nearly the same as I have seen in other batches of mascarpone made with ultra pasteurized heavy cream. I can taste the higher fat content as a slightly buttery flavor in the mascarpone. Nice. As a stand-alone product that can be spread on bread or crackers, this is a wonderful cheese.
Second question, is it worth the extra price? At $4.29 VS $1.62, I wouldn’t use it or my key lime mascarpone fillo cups, or for mixing with berries as the flavor of the cheese is masked by the added ingredients. Maybe for special occasions or for very discerning friends I would use this cream for making mascarpone cheese. But for “everyday” use, I can accept the quality of mascarpone made from $1.62/pint Wal-Mart heavy cream.
I have seen three different recipes for mascarpone. One using lemon juice, one using tartaric acid and one using crème fraiche culture. I have used lemon juice and tartaric acid for making mascarpone cheese. And of the two, I prefer the taste of the lemon juice mascarpone. The cheesy geek will get some crème fraiche culture in my next supply order and try it out and see if there is a taste and/or textural difference.

Friday, April 30, 2010

The beginning of my journey

Let’s step back to the beginning. No, NOT “In the Beginning. . . rather, the beginning of my journey into the world of cheese making.

As I mentioned before, I have always liked to cook. In recent years, the number of TV cooking shows has exploded and there is even a cooking channel devoted to, what else, cooking. (Go figure) In one episode of “Kitchen Nightmares”, Chef Ramsey taught a kitchen crew how to make mozzarella cheese for their Italian restaurant. While they didn’t show the actual process, I figured that if they were going to make fresh mozzarella everyday, it couldn’t be that hard or take very long. SOOOO, Geek George did what most geeks do and went to the Internet and started looking for recipes/instructions for making Mozz. I quickly learned that almost all roads to home cheese making leads to one place. The Cheese Queen, Rikki Carroll. (More later) It seemed that no matter where I went to find a cheese making kit for Mozzarella on the Internet, Rikki Carroll’s name was there and her “30 Minute Mozzarella and Ricotta Kit” was the recommended path for beginning cheese makers.

It didn’t take long to part with the $24.95 plus shipping and anxiously await its arrival on my doorstep. I continued to read about cheese making and paid particular attention to milk selection. I don’t have a source (yet) for farm fresh milk so I am forced to use store bought. So far I have used whole milk from Winn Dixie, Publix and Wal-Mart. Due to the volume they sell; I have found the freshest is usually at Wal-Mart. Although Public is a close second and has one of their dairy plants nearby. (update: Friday Publix milk was dated for May 12, Saturday morning at Wal-Mart the milk was dated May 19)

This was my first attempt at making any type of cheese. I have made 10 batches since I started and have gotten mixed results. The first batch was so soft that when I cut it the sides bulged out and whey formed droplets on the cheese (I didn’t drain it long enough). The second batch was more like tasteless plastic, (I drained it too long and worked it too much.). I poured two batches down the drain because the curds didn’t look like the pictures (I later learned that they would have still worked if I had put them in some cheese cloth and let them drain until they stopped dripping.)

I ordered some lipase powder and tried that for extra flavor. It works. (Just remember to use ½ tablet of rennet instead of ¼ the recipe calls for). I have been using 1/8 tsp per gal mixed into ¼ cup of unclorinated water 20 minutes before adding it to the milk just before adding the rennet.

Liquid smoke works if you like the smoky flavor in your Mozzarella. I used 1tsp per gallon of milk, stirred in just before adding the rennet. Try to find a liquid smoke without molasses or vinegar. I found one with just two ingredients: water, natural hickory smoke concentrate.

This kit does have everything you need to make Mozzarella and Ricotta except for the milk and a pot to heat the milk in. or the microwave safe bowl and microwave. Or the knife to cut the curds. Or a spoon to stir the milk. Or plastic wrap for the finished product. Or measuring cups and spoons. Or the gloves it suggests you use to stretch the mozzarella so you don’t burn your hands on the 135degree curds. Or the ice for the ice water bath at the end. I think it assumes you have a range and refrigerator because they aren’t in the box either.

The instructions included in the kit are simple and illustrated and include some recipes for using the cheese once you make it. (Unless you eat it all before it even has a chance to cool). Although it says it is a “30 Minute” recipe, using store bought milk the 5 minute curd set up time after adding the rennet has been at least 10 minutes and as long as 30 minutes using ¼ tablet of rennet. Adding the Lipase and ½ tablet of rennet, setup has been fairly consistent for me at 10 minutes. On average, it has been taking about 45-50 minutes from start to in the mouth.

Hope you have enjoyed this post. I do enjoy and am encouraged by comments if you are so inclined to do so. Also, if you would like to be notified when I update this blog, click the “follow” button and add you email to the list.

Thank you for reading.
George

Thursday, April 29, 2010

What to do with Mascarpone cheese?

You may have noticed the desserts at the top and bottom of the last post. If you are wondering what they are and how they are made, read on. If not, then skip this post and read something else. (-:
Mascarpone is used in some tiramasu recipes. Due to the cost and limited availability of Mascarpone, ricotta is often used instead. Cannolis are usually made from ricotta impasata or mascarpone. Fresh berries mixed into mascarpone is a real treat with any meal.

The Blackberry Mascarpone dessert was an attempt at combining the fresh berry and mascarpone with a "finger food" dessert.Blackberry Mascarpone on shortbread cookie

I made the Mascarpone the night before and set it in the colander to drain over night. In the morning I put it in a bowl and added 3 Tbs of blackberry mash. (fork smashed blackberries and two tsp of sugar) I then put it in a quart plastic container lined with paper towels and a coffee filter and let it drain another 6 hours in the fridge.

Put the mascarpone on a shortbread cookie and top with a whole berry.
Dust with powered sugar and serve.

This may be made substituting any in season berry you have available.

Yield: 24 cookies


Key Lime mascarpone fillo cups

This dessert was born out of a "mistake". While making the mascarpone, I added too much lemon juice and it had a slightly sour taste. Instead of throwing it out, I added a Tbs of powered sugar and 2 Tbs of Key Lime juice and mixed well. I purchased the frozen mini fillo cups (15 for $2 at Winn Dixie) and filled them with the mascarpone. Topped with some lime zest for color, this dessert was a hit at work. (Did I hear: "May I have another?" more than once?)

Yield: 30 with some left over.

Wednesday, April 28, 2010

Mascarpone Cheese


There seems to be a lot of recipes/methods for making Mascarpone Cheese on the internet. I have made a few batches over the last few weeks and am getting good results using the following method:

Ingredients:
1 pint heavy whipping cream (I used the Wal-Mart brand ultra pasteurized at $1.62)
1 large lemon (from Winn Dixie for $.79)

You will also need the following equipment


A double boiler
A colander
Some cheese cloth (enough to line the colander with four layers)
2 8-12 cup paper coffee filters. (Larger would be even better)
A spoon to stir the cream (I use a wooden spoon for this)
A cooking thermometer (I use an “instant read” thermometer)
A bowl big enough to put colander into

Squeeze 1 Tbsp of lemon juice and put aside.
Put the cream into the double boiler and heat cream to 190 degrees stirring slowly but steady after the water comes to a boil. (This is one time it is ok for the top pan to sit in the water in the bottom pan).
While gently stirring add the lemon juice and continue stirring for 5 minutes. (You should notice the cream starting to coat the spoon with a thicker layer of the cream)
Remove from heat and take the top pan out of the boiler and let it cool for 20 minutes. (or until the temperature cools to below 120)
Line your colander with 4 layers of cheese cloth and place one coffee filter on top of the cheese cloth.Put the colander into the larger bowl.
Pour the cooled cream into the coffee filter and let sit for 30 minutes until it is close to room temperature.
Cover bowl with plastic wrap and put into the refrigerator for 6-12 hours.
(The longer it sits, the thicker it becomes)

(Optional)If you need a really stiff product, take the some paper towels and put them in the bottom of a one quart plastic container and put the second coffer filter in on top of them.
Spoon out the center of the Mascarpone from the colander and place it in the fresh filter then put the remainder on top of that. Cover and place back into the refrigerator for another 6-8 hours until it is the desired consistency.

Remove the cheese from the filter and put into the container of your choice, stir well then cover and store until ready to use. The sooner you use it the better the flavor.

Yield: ??? I haven't measured the yield yet but my guess it is close to 14 oz as there is very little water draining off. I'll update this when I figure it out. (Update May 1. My last batch had a yield of 11 oz.)

Average shelf life 1 week.

Who is the Cheesy Geek?

I am a computer geek who likes to cook and recently began making cheese. In the past few months I have successfully made: Mozzarella, Goat milk Mozzarella, Gouda, smoked Gouda, Farmhouse cheddar, Feta, Goat Milk Ricotta, and Mascarpone. (not in this order, it just the order it came out of my head this time) My oldest sister called me the cheesy geek on Facebook and I like it so that is what I'll use for this blog.

TBH I'm not a big fan of eating cheese. The techie geek in me enjoys the learning and making of the cheese. I really enjoy seeing the positive reactions people have when they taste both my cheese and my cooking. I have given away most of the cheese that I've made so far and all I have to say is: Compliments will get you. . . More Cheese.

I have been cooking since high school and have a few dishes "perfected". I'll probably share some of these at some point. Our children are grown and out of the house but when they do come home I know that I will be asked to cook up one of their favorites.

But for now, I'm going to see how this blogging thing works and if it holds my interest for a while.

Enjoy